You can choose your favorite images to see detail drawing instructions:
Hello
Today, drawing123.com will show you how to draw the lizard
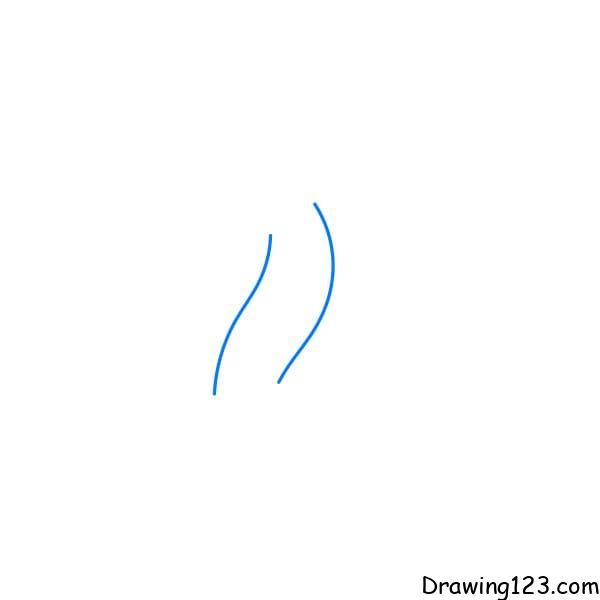
Step 1: First, draw two lines as drawn to create the body of the lizard
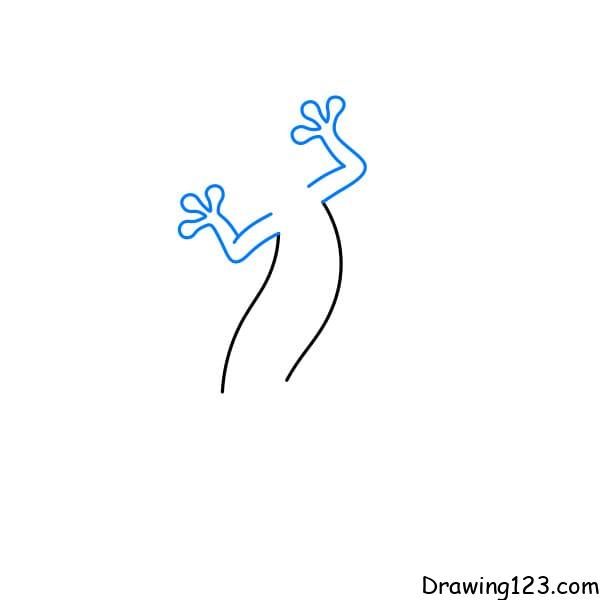
Step 2: Draw its front and hind legs, respectively.
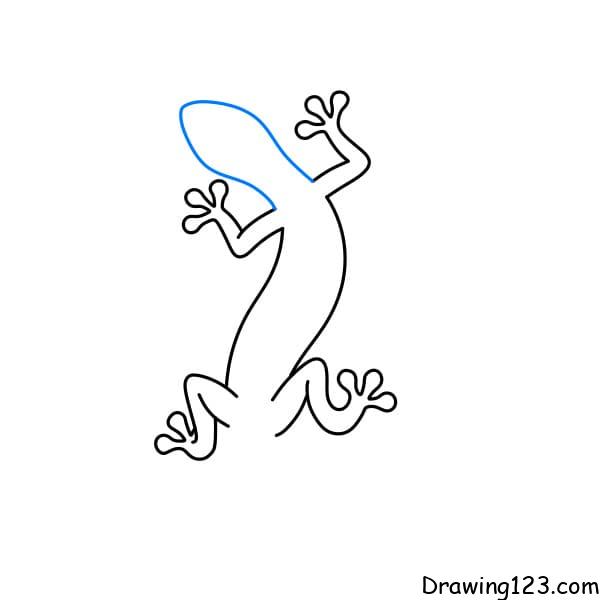
Step 3: Draw the lizard’s head
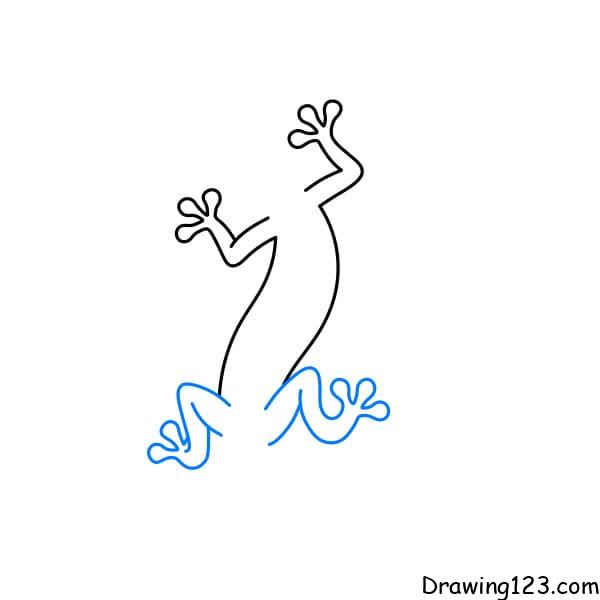
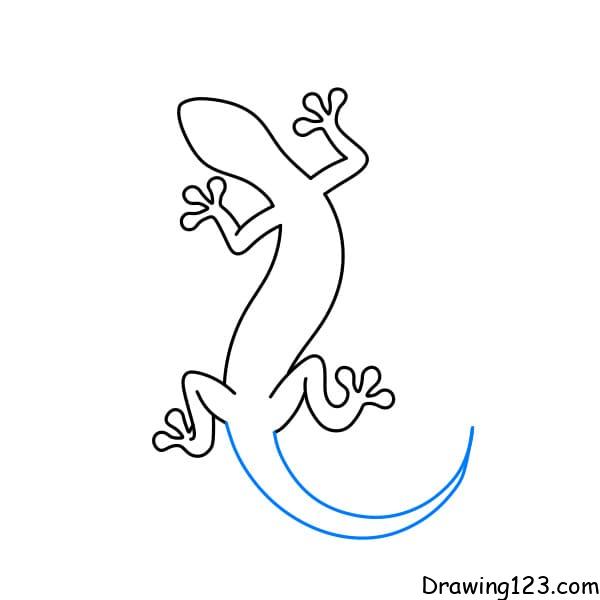
Step 4: Draw the tail of the lizard
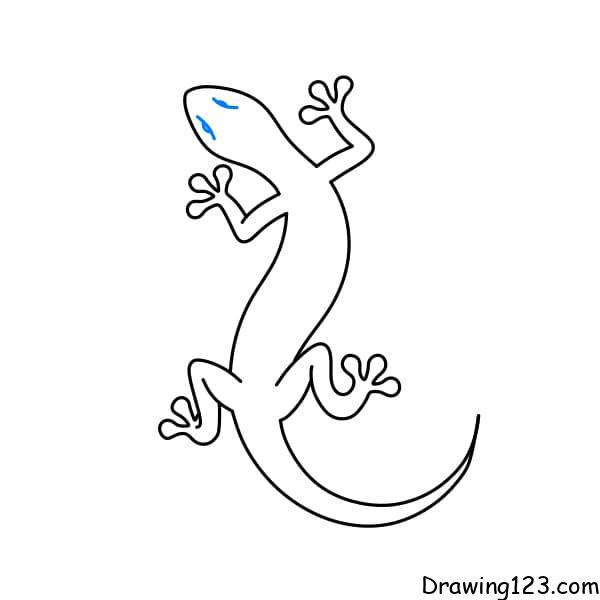
Step 5: Don’t forget the lizard has a pair of eyes at the head
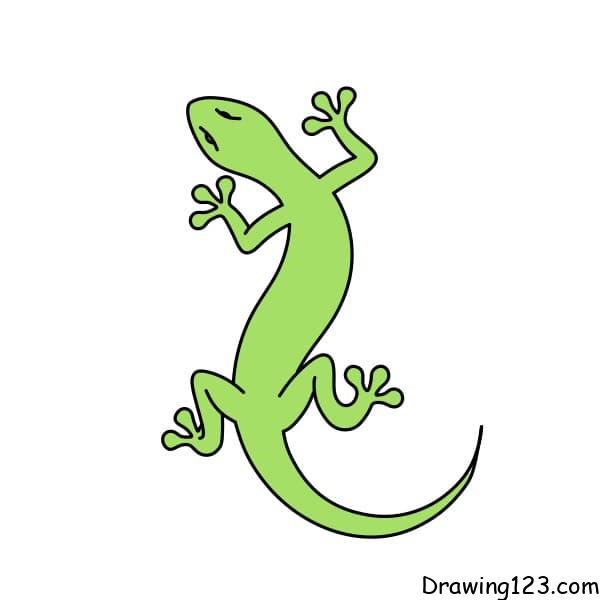
Step 6: Color the lizard picture
Step 1 :
Draw the lizard’s head, starting with a simple curve to create the basic shape of the head.
Step 2 :
Add the jaw and the small curve as the smiling mouth.
Step 3 :
Draw the big eye, including a small circle inside to form the pupil.
Step 4 :
Draw the body of the lizard, starting from the head and extending down, creating a large curve to outline the body and tail.
Step 5 :
Draw two front legs, each with toes with rounded shapes at the tips to give the impression of grip.
Step 6 :
Draw the back legs similar to the front legs, making sure they are in proportion to the body.
Step 7 :
Draw more contours along the body to create more detail.
Step 8 :
Color the picture.
Step 1 :
Draw the head using a curved line that forms an oval, outlining the basic shape of the lizard’s head.
Step 2 :
Add details to the mouth and nose, with a small curve to represent a smile and a small dot to form the nostrils.
Step 3 :
Draw the big eye, consisting of a large circle and a smaller circle inside to create the pupil. Add reflective details in the eyes to make them more vivid.
Step 4 :
Sketch the body with a curved line extending from the head to the back, creating the basic shape of the back and tail.
Step 5 :
Draw two front legs, each leg has three small toes with round tips, creating a lovely and cute pose.
Step 6 :
Draw the back legs, similar to the front legs.
Step 7 :
Add contour details to the belly and tail to complete the body shape.
Step 8 :
Color the drawing.
Step 1 :
Sketch the head using a round and slightly wavy shape, creating the basic shape of the lizard’s face.
Step 2 :
Draw two large circles as the eyes. Add small circles inside to create pupils, giving the eyes liveliness.
Step 3 :
Add details to the face, including the nose and mouth, with a long curve to create a friendly smile.
Step 4 :
Draw the left front leg, including a curve connecting to the body and small toes, to create a natural feel.
Step 5 :
Draw the right front leg, similar to the left leg, ensuring balance and harmony.
Step 6 :
Add details to the belly, including horizontal lines at the belly for texture.
Step 7 :
Sketch the tail with a long curved line extending from the back of the body, showing the undulating shape of the tail.
Step 8 :
Draw the left hind leg, with a similar shape to the front leg but slightly larger, to show stability.
Step 9 :
Add short stripes on the tail.
Step 10 :
Color the drawing.
Step 1:
Draw a curve to shape the head.
Step 2:
Draw a small curve below to form the mouth.
Step 3:
Draw a circle for the eye and add details inside to create the pupil.
Step 4:
Draw the body and tail extending from behind the head.
Step 5:
Draw the first two legs of the lizard.
Step 6:
Draw another leg with short curved lines to form the toes.
Step 7:
Finish the other leg with similar strokes.
Step 8:
Color the drawing.
Step 1:
Draw the head of the lizard.
Step 2:
Draw another curve to form the mouth.
Step 3:
Draw the eye with ovals and add details inside to create the pupils.
Step 4:
Draw the lizard’s body and tail extending from the head down.
Step 5:
Draw the first leg with small curves to form the toes.
Step 6:
Draw another leg with similar strokes.
Step 7:
Draw the rest two legs of the lizard.
Step 8:
Color the drawing.
Hopefully, the tutorial on how to draw a lizard will help you have a beautiful picture!