My Melody Drawing Tutorial - How to draw My Melody step by step

My Melody Drawing

You can choose your favorite images to see detail drawing instructions:

1. Instructions on how to draw simple and funny my-melody for kids

Hello!

Today, drawing123.com will teach you how to draw funny and cute my-melody for your baby

how to draw my melody

Let’s start!

Step 1:

First, you draw an oval
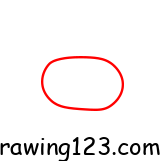
Step 2:

Next, you draw long ears for my-melody
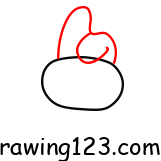
Step 3:

Next, you draw the body
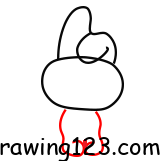
Step 4:

You draw your hands
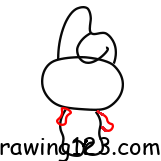
Step 5:

You draw a cape
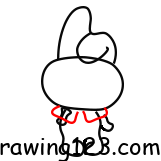
Step 6:

You draw a flower above your ear
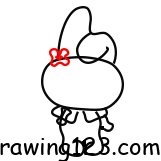
Step 7:

Don’t forget to draw eyes, nose and mouth for my-melody

Step 8:

You use eraser to erase excess lines
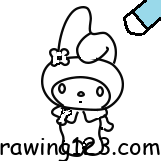
Step 9:

Finally color to complete the picture

2. Simple instructions for drawing My Melody.

Step 1 :

Draw two long ears on top of the head with two curved lines.

Step 2 :

Draw the head with a curve.

Step 3 :

Add small flower detail on right ear.

Step 4 :

Draw the lower part of the face using an oval in the middle of the head.

Step 5 :

Add facial details: the eyes are two small circles, the nose is a small circle in the middle, and the mouth is placed below the nose.

Step 6 :

Draw the collar below the face.

Step 7 :

Add arm pieces on either side of the body, attached to the bow at the collar.

Step 8 :

Draw the lower body legs.

Step 9 :

Color the drawing.

3. How to draw My Melody’s head.

Step 1 :

Draw an oval for My Melody’s face.

Step 2 :

Add a small flower to the left of the head.

Step 3 :

Draw two bunny ears – one up and one down.

Step 4 :

Sketch an oval inside the face, creating a frame to add facial detail.

Step 5 :

Draw eyes, nose and mouth to complete the face.

Step 6 :

Color the drawing.

4. Happy My Melody drawing tutorial.

Step 1 :

Draw a curve outlining the ear.

Step 2 :

Draw the head with a curve.

Step 3 :

Draw an oval inside the head which is the part to draw the face.

Step 4 :

Add facial details, including oval eyes, a small nose, and a slightly curved mouth.

Step 5 :

Draw a collar for the character.

Step 6 :

Draw the torso and legs, with gentle curves to create a side profile.

Step 7 :

Draw a small tail detail at the back.

Step 8 :

Color the drawing.

5. Instructions for drawing cute chibi My Melody.

Step 1:

Draw a slightly flattened oval for the character’s head.

Step 2:

Add a small bow in the upper left corner of the oval.

Step 3:

Draw two long, upright bunny ears on top of the head.

Step 4:

Add a smaller oval at the bottom of the head to create the face.

Step 5:

Draw two large, round eyes with details inside to create a sparkling effect, and add a nose and mouth in the middle.

Step 6:

Draw My Melody’s two hands in front of her, making a cute pose.

Step 7:

Add small body details below, including legs and curves that create the body.

Step 8:

Color the drawing.

6. How to draw My Melody crying.

Step 1:

Draw a small bow in the middle, this is the bow on My melody’s head.

Step 2:

Add two long bunny ears on either side of the bow, one ear slightly curved down for a natural look.

Step 3:

Draw an oval head surrounding the bow and ears.

Step 4:

Add a smaller oval inside the head to create the face.

Step 5:

Draw the facial details, the eyes are two straight lines with curves that form like tears.

Step 6:

Draw her hands in front of her face, making a cute pose, as if My Melody is covering her mouth.

Step 7:

Draw the shirt on both sides of the character’s shoulders.

Step 8:

Add a small lower body with soft curves, including legs and torso details.

Step 9:

Color the drawing.

Hopefully, through this simple and funny tutorial on how to draw my-melody, it will help you have a beautiful picture!